
WHAT IS MOKUME GANE?
Mokume Gane, or wood grain metal, is a traditional Japanese technique in which two or more different metals are meticulously cleaned, alternately stacked, compressed and heated to a high temperature. The result is the fusing of all layers into a solid block of metal or billet. The billet can be made into sheet metal with a variety of patterns by repeatedly carving through layers and reducing the thickness. Ring stock can be made by twisting a thick piece to re-orient the layers and removing material to reveal a hidden pattern.
This is a simplified definition to a complex technique. One dating back hundreds of years with roots in blacksmithing, but currently most recognized in contemporary wedding rings. It’s a material unknown to most consumers and not fully understood by those in the field. It became necessary to educate and demystify to make it more approachable. Steve Midgett was the first to achieve this with his book, Mokume Gane in the Small Shop. It explained his method in detail and included step-by-step projects proving it could be made in a modestly equipped studio and not break the bank with materials costs. This book was my map to figuring out Mokume. From its influence I created my own system focusing on a low tech, low cost and efficient method to making traditional fusion bonded Mokume Gane.


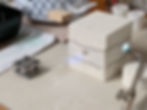


billet with clean edges


Traditional Diffusion Bonded Mokume Gane
Mokume Gane can be made by sweat soldering sheets of alternating metals, but this process can be frustrating, time consuming and yield very little workable material. Using traditional Japanese ideas with modern equipment can result in a much better outcome. There are three key components to making a successful Mokume Gane billet:
-
The stacked metal must be clean and free of any surface oxides or contaminates.
-
The stacked metal must be held under very tight pressure.
-
The stacked metal must be heated consistently to ensure proper bonding.
To put it simply, at least 2 different metals in sheet form are thoroughly cleaned, alternately stacked, clamped together in steel plates, and heated until the layers fuse together. The stack is heated to the point where an alloy is created between each layer of metal. This alloy or interlayer is strong enough to hold all the layers together to make a billet. The billet can be worked down into a unique and beautifully patterned piece of sheet metal or made into ring stock. And just like most non-ferrous metals, it can be formed, manipulated, and soldered.
Equipment Needed to Fire a Billet
-
18-22 gauge sheet metal (good combinations: fine silver/copper, sterling silver/copper, copper/fine silver/shibuichi, fine silver/shakudo, 14k palladium white gold/sterling silver)
-
refractory brick mini furnace or kiln with digital controller
-
soldering torch
-
2- steel torque plates .25" to .5” thick with holes drilled in each corner
-
4- steel bolts (.25” x 1.25”) and nuts (.25” x 20 coarse thread)
-
c-clamp vice grips (holds the plates and stacked metal together while taping)
-
20-ton hydraulic press (if not available hand tighten using bench vise and wrenches)
-
small adjustable wrench
-
wood/brass cleaning jib
-
3M scotchbrite cleaning blocks
-
Simple green degreaser
-
pumice powder (from rio grande)
-
1” masking tape
-
Yellow ochre (anti-flux) or white out
-
utility knife
-
proper safety equipment (glasses, gloves, long pants, ear plugs, clothes-toed shoes)
Preparation
Starting with a billet made of either sterling silver or fine silver and copper is recommended. They are relatively inexpensive, bond well, and have similar working characteristics. Use 18-22 gauge sheets approximately 1” to 1.25" squared and no less than 12 layers. The metal should be hand cut to give a nice flush edge with no bevel. If a bench shear is used the edges need to be filed to eliminate the beveled edge. Make sure the squares fit in the cleaning jig and re-cut or file if necessary. If the metal is not dead soft anneal, pickle and rinse. Next check for deep scratches or pits. If there are any deep blemishes discard or use that piece on the top or bottom layer. Also check to make sure each piece is flat-no wavy metal. Sand each square on a flat piece of 320 grit sandpaper. Now, it is time to really clean the metal.
The following steps should be done immediately preceding the firing of the billet. Starting with the silver, scrub the surface of each square with a scotch-brite block loaded with simple green and pumice powder. Use the cleaning jig-clamping it to a table will make it easier. Be sure to handle the metal by the edges or wear latex gloves. Rinse and leave soaking in clean container with cold water. Next clean all of the copper sheets using a fresh scrub bl0ck. Keep the metal as clean as possible! Dropping on the floor or touching the surface means you will have to start the cleaning process over again. After all metal is clean and soaking in cold water, remove and place on clean towel. Dry both sides and check all surfaces for deep scratches or pits. If any piece of metal is suspect put aside and it can be used on the top or bottom of the stack. This process not only removes contaminants but gives the surface a tooth, which aides in fusion bonding.
Stacking
At this point setup the mini furnace and make sure everything is at hand before firing the billet. Also coat the surface of the torque plates with yellow ochre or white out. This will keep the stack from sticking to the steel. Carefully stack the sheets of metal-handling only the edges. Check to see the metals are alternating. Two like metals will not bond to each other. Once all the metal is stacked use c-clamp vise-grip to compress and hold the metal while wrapping a layer of masking tape around the edges. Remove any
excess tape-it should be covering the edges only. Transfer the stack to the torque plates, making sure its centered while hand tightening the bolts. To get maximum compression use a 20-ton hydraulic press. While compressing make sure the torque plates are parallel-this means there is even pressure throughout the stack. Again tighten each bolt with a small wrench and remove from the press. The masking tape can be removed from the edges and the stack can be checked for any gaps or irregularities, especially at the corners. If any light is visible through the layers use the hydraulic press to remedy. The stack is now ready for firing.
Firing
This is by far the most difficult part of the process. Firing a successful billet comes in large part with experience. First preheat the mini furnace for at least 5 minutes, achieving a medium red color to the refractory brick. With tongs place the torque plate assembly in the round chamber, closest to the view hole front of the furnace. Since the stack is situated at an angle two sides should be visible through the view hole. Also make sure the torch is not directly heating the assembly. In other words the torch should be running behind. The handle is placed in the lid and the furnace is sealed. The tip of the torch should rest about .25” inside the small side hole (depending on torch system). After a few minutes of heating, a blue flame will appear through the front view hole. This shows the heat is circulating properly and the environment inside the kiln has just the right mix of fuel and oxygen. The next clue to look for is change in color of the torque plates and bolts. They will go from dark grey to black, then dull red and eventually bright red to orange. At the red to orange point all focus is on the inside of the kiln. All metal inside will be glowing red-the torque plates, bolts, and the stack. The first signs of bonding will be the appearance of liquid edges on each silver layer and a high contrast between the two metals. It looks very similar to flowing solder. Also described as a wet look. When this is seen lower the heat by slowly turning down the torch. If possible allow the assembly to soak for a few minutes to make sure the entire stack reaches bonding temperature. If small beads or puddles appear turn off the torch immediately-this is taking it beyond diffusion.
The top brick can be removed to allow the billet to cool. Carefully remove the torque plate assembly and place in the hydraulic press. Compressing the billet immediately after firing will bond any areas that may have not fused and will also make it easier to remove from the torque plates. Do not over compress when using sterling silver-this will stress the metal and cause small cracks. Remove the bolts and disassemble the torque plates. Let the billet air cool for several minutes. Never quench the billet when it has been heated to annealing temperature.
Forging
Equipment needed for forging a billet:
-
18oz to 24oz ball peen or forging hammer
-
14” pick-up tongs or 7” flat jaw vise grips
-
anvil or thick metal plate
-
belt sander or angle grinder
-
rolling mill
-
proper safety equipment (glasses, gloves, long pants, ear plugs, clothes-toed shoes)
This next step, forging will determine if proper lamination has occurred. Before forging grind or cut off uneven edges until all the alternating layers are visible. At least 1/16" is removed to help prevent de-lamination at the edges. Setup an annealing station-several clean refractory bricks arranged to make a “cave”. Creating a dark area will help to see the dull red color when annealing. Do not forge a billet containing sterling silver if it is still red hot-wait until it has cooled and turned dark, or black hot. A billet with fine silver may be forged red hot to speed up the thinning process. Since the billet is too thick to put through most rolling mills, hand forging will have to be done instead. Use tongs or flat vise grips to hold the billet on an anvil or anvil surface. Typically a 1 to 2 pound hammer is adequate for forging these metals. Start hammering around the edges towards the center. The billet will have a nice dull sound when striking. This means good lamination. Normally copper and silver billets can be reduced 25-50% with one annealing. Be sure to anneal the billet often, and do not quench. If cracks and splitting occur trim off that area and resume forging. Again it is important to anneal often but do not overheat.
Patterning
There are two methods for making patterned sheet metal- bumping or chasing and carving. For the bumping method roll the billet to 16-18 gauge. Use different punches and chasing tolls to bump one side of the billet-it can be anchored in pitch or a block of wood for more stability. Keep in mind the shape of the punch determines the look of the pattern. To reveal the pattern grind away the bumps with files or a belt sander. Be careful not to over bump the metal or grind too much-this will cause holes to appear. After the grinding is done a rolling mill is used to even out the sheet and get the desired thickness. To hide any remaining dents solder a thin piece of metal on the back.
The second method used to pattern is carving or removing metal from the top layers down. The billet is thinned to 8-10 gauge using a rolling mill to ensure consistent thickness. Anneal and anchor the billet to a block of wood using small screws-one on each side. The flex shaft with grinding burrs can be used to carve through the first 3-4 layers. Run through the rolling mill until there is a shallow mark from the initial carving. This will act as a guide for the second round of carving. These steps are repeated until the desired pattern is achieved. Another subtraction method uses a drill press and larger size high speed twist drill bits. Again anneal the billet and anchor to a block of wood. A good size drill bit to start with is 1/8”. The goal is to drill through the first 3 layers, using just the tip of the drill bit. Since a drill bit is round the pattern will eventually be a concentric ring pattern. Again roll thinner until there is a shallow divot. Leaving the divot will make it easier to drill in the exact same spot. And again these steps are repeated until the pattern is developed and the sheet is flat. A rule of thumb to remember when patterning-starting with a thicker billet will result with thicker sheet metal. Starting at 8-10 gauge will result in 18-20 gauge patterned sheet.
Another way to get an interesting pattern is to cut off a section of the billet, about ¼” thick. Hammer the rod to elongate to 1 ½” but keep it square. Anneal the rod, put one end into a vise and start twisting. Anneal a few more times and keep twisting until it’s nice and tight. The rod can then be forged back square or put through a rolling mill. The outside twist pattern is nice, or cut the rod down the center to reveal an even more interesting pattern.
Seamless Rings
Instead of cutting into two pieces a seamless ring can be made using some forging techniques. After the stock is made square determine how long of a slot to cut through the center. Refer to the chart at the end of this handout. At each end of the slot drill a hole with a #60 drill bit. Its important to drill holes straight through the stock and not at an angle. Using a drill press will help drill precisely-a hand held flex-shaft will not work. After the holes are drilled the slot can be cut using a larger size jeweler’s saw blade (#4). Be sure to cut a straight even line so each side is the same thickness. Now the slot can be opened with a center punch or chisel end chasing tool. The ends can be hammered with a mallet to open the slot so it will fit on a ring mandrel. At this point the goal is to shape the ring round and to keep it the intended size. Use a metal hammer, but be careful not to stretch the ring to a larger size. Some interior filing can be done in order to make an inside liner fit snug. In fact the liner should fit so tight that it has to be hammered in place with a mallet.
An alternative to this method is to make a washer (½” opening and 1” diameter) from 18-16 gauge patterned sheet. A disc cutter and center tool will do the job or use a circle template to draw on the metal and hand cut. The next step is to dome the washer in a dapping block-to its smallest dome. After annealing it can be shaped on a ring mandrel to widen the smaller opening (originally ½”). The goal is to take make the form parallel-a band ring. This will result in a size 9 ring, approximately. A hollow ring can be made using a ring sizer/shrinker. This will give it a domed look, but will also make the ring smaller in size. The last step is to fabricate a sterling silver liner. A wide band ring is made using hard solder. The mokume ring should fit tightly over the liner and then soldered with medium. (Reminder: A small drilled hole in the liner is necessary when soldering a hollow ring form.)